We’ll look at the fundamentals of emptying a Roomba robot vacuum, which can differ depending on the model category.
From the entry-level 694 to the top-of-the-line J7+, I tested every Roomba product in a range of price points, and I’ll outline the precise procedures for emptying each one.
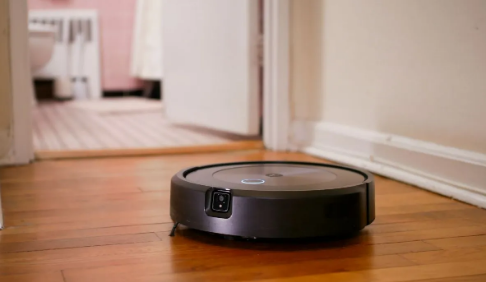
Emptying a Roomba robot vacuum is something a necessary maintenance step to keep these machines functioning at their peak.
To prevent dust mites from breeding, don’t store debris in the trash can for an extended period of time.
The task of removing and discarding a bag is made easier by the clean base station on more recent Roomba models.
You won’t have to dump debris in a trash can at the end of each run if you selected one of the better options.
Table of Contents
How Do You Empty a Roomba?

There are many different models of Roomba robots, so in order to prevent any unanticipated mishaps, it is best to stick to the instructions for your particular model when emptying a Roomba. I’ll divide this how-to manual into different sections to keep things simple, so you only need to read the instructions that apply to your model.
1. How to Empty the Dustbin of the Roomba 600 Series
If you’re using a Roomba 614, 670, 675, or 690, follow these steps to empty your robot:
- Press the tab on the vacuum’s edge to release the dustbin.
- Click the small yellow latch on the edge of the bin to remove it.
- Put the contents of the container in the trash.
- As much debris as you can remove by gently tapping it.
- Empty the filter, which is located inside the trash can.
- Reinstall the filter after finishing, and then shut the door.
- You’re done when you place the trash can back in your Roomba.
2. How to Empty Roomba 800 and 900 Series
You don’t need to worry about how to empty a Roomba because I’ll give you specific instructions for your model, as was already mentioned. Now, if yours is a Roomba 805, 890, 960, or a 980, follow these steps:
- Pressing the tab on the edge will allow you to remove the trash can.
- Pull the top of the dustbin toward the ground to open the door.
- To empty the dustbin completely into your trash can, shake and tap it.
- Dust from the trash can be removed if necessary using a microfiber cloth.
- Open the top of your dustbin and then clean the filter.
- At the filter’s edge, there is a tab that you can pull.
- Clean your filter by following the same instructions, and then throw it away.
- Reinstall the filter in the trashcan, making sure the tab is facing up.
- Next, shut the door after closing the latch.
- Reintroduce the trashcan to the vacuum.
Owners of vacuums from the Roomba 800 and 900 series should also clean the sensors, which are found at the bottom of your robot. To clean the dust off these sensors, use a melamine foam or a microfiber cloth.
How to empty the Roomba bin for E5 and i7 models
The 800 and 900 series robots and these two robots share a similar design. Nevertheless, you can empty the bins by using the same procedures as above. Rinse the inside of the trash can with cool water if you’d like, but avoid putting the trash can in the dishwasher. Please avoid letting the filters come into contact with any liquid because they are not washable to prevent them from becoming damaged.
3. How to Empty Roomba E5
The Roomba E5 is a step up from the options in the 600-series, and as such, it has a different dustbin design.
The E5 pivots open in contrast to the 694 or 675 Roombas, which slide off.
iRobot moved the button from the top towards the back, which I like it because it stops unintentional drops when picking up the robot from the back.
A change has been made to the opening procedure.
Steps to emptying the Roomba E5
The steps will be the same for these robots (at least the non-plus versions), as the Roomba E5 has the same dustbin as the more expensive Roomba I3 and I6.
1. Remove the dustbin
To unlock and take the dustbin off the robot, depress the release latch behind the trash can.
2. Dump the contents into the trash container
Swing the trash can out, then open the door and empty the contents into a garbage can.
The smaller opening on the E5 makes it a little trickier.
There will be more buildup, but since the robot’s motor is inside, the E5 container is washable (remember to remove the filter).
4. How to Empty the Roomba Robots of the S9 Series
You’ve come to the right place if you’re wondering how to clean a Roomba S9 model. Since S9 models are machine washable, they empty a little differently than other models. Below are the most simple steps you can follow:
- To access the dustbin, raise the top lid of the vacuum.
- To remove the dustbin, pull the side handle.
- Open and remove the filter by lifting the filter door.
- Clear the filter of any dirt and debris.
- Press the grey release button to remove the trash can.
- After emptying the dustbin’s contents into a trash can, shake and tap the container to make sure everything is gone.
- The trash can should be thoroughly cleaned with cool water before being placed upright to dry completely.
- To clean the interiors and remove embedded dust from the sensors, use a microfiber cloth.
- Close the bin’s lid once it has dried.
- Close the lid after replacing the filter.
- Reinstall the dustbin in the vacuum’s body.
- Make sure all the dustbin doors snap back into place correctly.
5. How to Empty the Roomba I-Series [I3, I4, I6, I7]
Four I-series variants are available – the I3, I4, I6, and I7.
But keep in mind that the steps will be similar and that all of these variations have the same dustbin design.
For non-plus options or base stations without clean signals, follow these instructions.
Steps to emptying the Roomba I3, I4, I6, and I7 [no clean base station]
1. Remove the dustbin
The I-Series and E5 both have the same dustbin. To unlock the lock, pull the release lever behind it.
Move on to the next step after removing the trashcan.
2. Dump the contents into a trash container
Empty the contents of the trash can by opening the door.
Customers will require a brush to remove debris from inside because the opening is tiny and restricted.
Steps to empty the Roomba I3+, I4+, I6+, and I7+ [with clean base station]
The I-series plus will have a different set of steps. These variants have a clean base station that empties the robot’s trash bin for you at the end of each run.
However, since the self-emptying mechanism won’t completely clean the bin, keep checking the trash can.
6. How to Empty the Roomba J7 and J7+
We’ll look at the steps for emptying the flagship J7+ last. There are two J7 options: a non-plus and a plus model.
Because these models share a dustbin, the steps for the non-plus J7 are similar to those for the I-series.
The Roomba J7 and I3 have similar dustbin designs, as seen in the image above.
The steps are outlined in the section below.
- Press the release latch to remove the dustbin: With the rear latch, the J7+ dustbin resembles the I-series. To release the container, push this lever.
- Open the door, then empty: Put the dustbin back in its place after removal and use it to empty the trash.
The steps with the clean base station are similar to the I-series despite the design changes.
These variations must make use of the same bag that slides in from the top.
- Check to see if the bag is full by opening the clean base station.
- If the bag is full, remove it and throw it away.
- Place a new bag.
How Often Should You Empty a Roomba?
We are all aware that routine maintenance can increase the lifespan of our home appliances, and robot vacuums are no exception. But how frequently do you need to empty it?
Robot vacuums collect debris in a tiny interior dustbin to function. iRobot recommends its users empty the dustbin every three cleaning cycles, but it all depends on how dirty your floor is. If you regularly vacuum your home and have a few pets, it’s best to empty your Roomba every day or every two days.
How Often Should You Replace a Roomba Filter?
If you’ve ever used an upright or canister vacuum, you know that vacuum bags and Roomba filters both need to be changed on a regular basis. iRobot says that you should replace your Eight weeks pass between Roomba filters.
This again depends on how frequently you vacuum and whether you have pets. To ensure your robot runs at its best, I advise changing your filters more frequently if your home is big and you have a few furry friends.
Roomba’s filter should be cleaned whenever you empty the dustbin Via Amazon
How to Reset a Roomba
No matter how well-built your Roomba is, occasionally you still have issues to solve. A straightforward solution is to reset your Roomba to get it back on track; you don’t need to be an engineering or technical expert to know how to do this. Here are a few quick tips to reset your robot that I’ll share with you regarding how to empty a Roomba.
The 500, 600, 700, 800, and 900 series Roomba models only require that you turn them off, unplug them, and press the CLEAN button until the green light turns on. The robot must then rest for about 10 seconds before being turned back on and having the time, date, and schedule reset as needed.
The Roomba i3 and i7 have slightly different designs, but they can both be reset with ease. Simply press and hold the HOME, SPOT CLEAN, and CLEAN buttons simultaneously until the light on the CLEAN button becomes bright, and then let go of all three buttons. After that, give your robot about 20 seconds to reboot. It can now resume performing its typical duties.
How to Clean the Brushes and Wheels
In every cleaning cycle, the wheels and brushes of robot vacuums come into contact with your floors. Nevertheless, when they rotate, dirt and debris gather. These spinning components can also become encircled by string and hair, which will slow their rotation.
Therefore, in addition to learning how to empty a Roomba, you probably want to learn how to clean the robot’s wheels and brushes. A cleaning toolbox that you can use to remove debris is typically included with Roomba robots. Alternatively, you can dive in and clear the debris with your bare hands.
1. Cleaning the Brushes
The likelihood of problematic objects wrapping around your robot’s brushes and wheels will be reduced if debris and hair are regularly removed. However, how do you wash the hairy brushes? Read on, as I explore more detail in the following steps:
- On the floor, position your Roomba upside down.
- Pull back the two yellow levers to release the brush guard.
- Pull the yellow plastic bearing at each of its ends to release the brushes.
- The bristle has hair wrapped around it, as seen. Remove them now, please.
- Once you’ve finished removing the toughest hair clumps from the bristles, use a soft, dry microfiber cloth to clean the brush compartment.
- Reposition the brushes inside the container. Keep in mind to insert the gray ends first.
- All that’s left to do is to snap the brush guard back into position.
Roomba brushes are easy to remove and clean Via: Amazon
What about the side brush now that the main brush has been cleaned? Yes, I am referring to that tri-brush. Since it’s obvious, let’s clean it up as well. Just follow these steps:
- Take your robot’s chassis apart, starting with the side brush.
- Take out the side brush.
- Use a pair of scissors to cut the hair that is tightly wound around this brush, and then pull the hair away.
- Put the brush back into the main part of your robot.
2. Cleaning the Wheels
Although most of us typically overlook cleaning the wheels, hair can also easily encircle your robot’s wheels. However, iRobot advises users to check on them once every few weeks. As your robot sweeps the floors, try to clean them up before you notice their jerky movements.
Why not clean the wheels as well, with your robot facing up, after cleaning the brushes? It’s pretty simple, really. Here are a few steps to follow:
- Straighten the wheel out.
- Take off the hairband that is affixed to the axle.
- Utilizing a soft cloth, clean the wheel.
- Clean out the wheel compartment.
- Whereas dirt and dust typically hide, clean the wheel housing.
- Push the caster back into position after snapping the wheel back into position.
You may be wondering how to clean the side wheels now that the front wheel has been thoroughly cleaned. Can they be taken off with the same ease as the front wheels? Your Roomba’s side wheels cannot be removed, so no, really. However, you can remove the dust and clumps while leaving them in place. Dust, hair, and debris can be released by repeatedly spinning the wheels while pushing them in and out.
Final Words: Empty An IRobot Roomba
I hope you’ve learned some useful instructions on how to empty an iRobot Roomba. Regular inspections and maintenance, just like with any robot vacuum cleaner, will guarantee its proper operation. It will stay with you longer if you take better care of it.
Owners of Roombas should remove the filters after a number of cleaning cycles in addition to emptying the dustbin. Its brushes, wheels, and cliff sensors also require routine cleaning. We previously shared some tips for caring for these components. Please post your inquiries in the section below, and we’ll get back to you right away.

MOST COMMENTED
How to
How to Clean Homedics Humidifier: Detailed Guide
How to
Are Humidifiers Good for Pneumonia? Complete Guide
How to
Can You Put Drano in a Dishwasher? (Facts & Safe Alternative)
How to
How to Turn Subtitles on Or Off on Peacock TV: 2023 Guide
How to
How to Get Rid of Hollow Arrow on iPhone? 2 Simple Ways
How to
How to Mirror iPhone to TV Without WiFi: Complete Guide
Computers, Tablets & Printers
The 5 Best Printers for Cricut in 2022